 Pin this
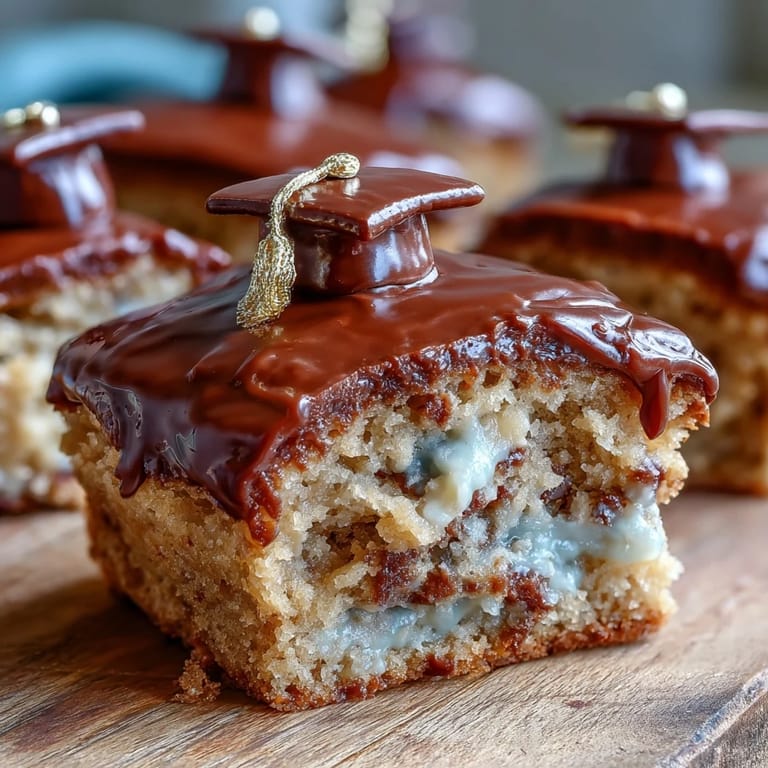
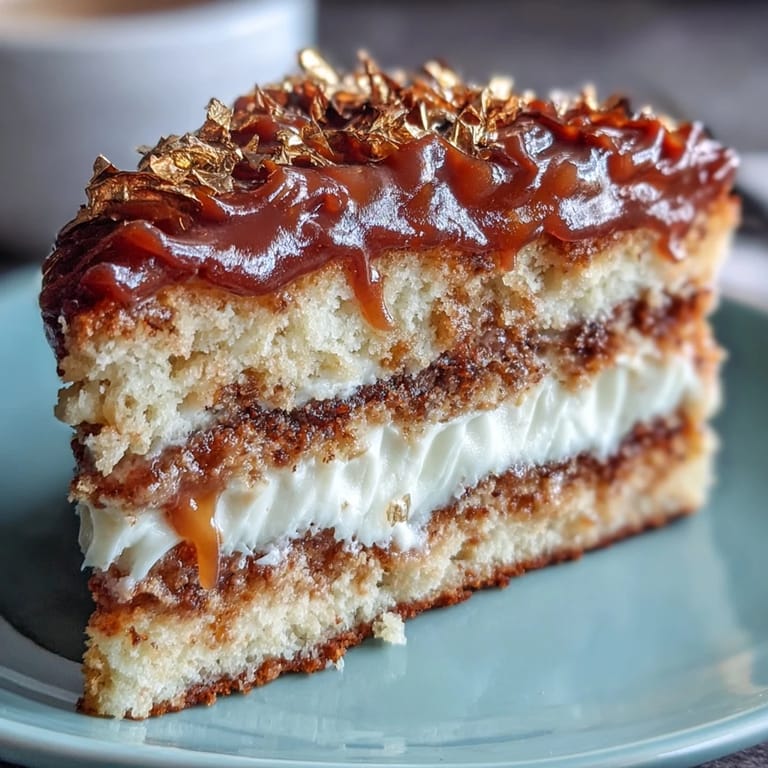
 My daughter's high school graduation landed on a sweltering June afternoon, and I decided right then that a homemade cake was the only way to mark the occasion. I'd watched her grow from someone who could barely reach the kitchen counter to someone heading off to college, and this cake felt like the perfect way to say, without getting too sappy, that I was proud. The gold foil seemed like the right touch—a little glamour for a day that deserved it.
I remember standing in my kitchen the morning of the party, realizing I'd somehow pulled off something that looked genuinely fancy without needing a culinary degree. My hands were shaking a little as I applied the gold foil—partly from nerves, partly from the caffeine—but something about the delicate work settled me down. By the time family started arriving and saw that cake sitting there, gleaming under the afternoon light, I knew I'd made the right call.
Ingredients
- All-purpose flour: Two and a half cups is the backbone of a tender crumb; sifting or whisking it with the baking powder helps avoid dense pockets.
- Baking powder: Two and a half teaspoons gives you a gentle rise without any metallic aftertaste.
- Salt: Just a half teaspoon, but it brightens the vanilla and keeps the sweetness from feeling flat.
- Unsalted butter: One cup in the batter and another cup and a half for frosting; softened butter is non-negotiable for creaming properly.
- Granulated sugar: Two cups in the cake batter; beat it long enough with the butter that the mixture turns pale and fluffy.
- Eggs: Four large eggs at room temperature beat in smoothly and create a tender crumb.
- Vanilla extract: One tablespoon for the cake, two teaspoons for the frosting; real vanilla makes all the difference.
- Whole milk: One cup for the cake and three to four tablespoons for the frosting, both at room temperature so they don't shock the batter.
- Powdered sugar: Five cups for the frosting, sifted to prevent lumpy spots.
- Edible gold foil: The delicate sheets apply easily with dry tweezers and transform the cake into something celebratory.
- Diploma topper: Store-bought versions save time, but homemade fondant toppers let you customize the look completely.
Tired of Takeout? 🥡
Get 10 meals you can make faster than delivery arrives. Seriously.
One email. No spam. Unsubscribe anytime.
Instructions
- Set the stage:
- Preheat your oven to 350°F and grease two 9-inch round pans, then line them with parchment paper so the cakes slide out cleanly. This takes about five minutes but saves so much frustration later.
- Mix the dry ingredients:
- Whisk flour, baking powder, and salt together in a medium bowl; this aerates everything and distributes the leavening evenly. Set it aside and trust that you've done this step right.
- Cream butter and sugar:
- In your largest bowl, beat softened butter and sugar on medium-high speed for three to four minutes until the mixture looks pale, fluffy, and almost billowing. This is where the magic starts; don't rush it.
- Add eggs one at a time:
- Drop in each egg individually, beating well after each one so it fully incorporates before the next one arrives. This patient approach creates a more stable, tender cake.
- Add vanilla and alternate wet and dry:
- Stir in the vanilla extract, then begin alternating the flour mixture and milk, starting and ending with flour. Mix until just combined; overmixing toughens the crumb.
- Divide and bake:
- Pour the batter evenly into both pans, smooth the tops with a spatula, and slide them into the preheated oven. Bake for 28 to 32 minutes until a toothpick comes out clean; your kitchen will smell incredible.
- Cool with patience:
- Let the cakes rest in the pans for ten minutes, then turn them out onto wire racks to cool completely. This slight wait prevents them from cracking.
- Make the frosting:
- Beat softened butter on high speed for about three minutes until it's pale and creamy, then gradually add sifted powdered sugar. Add vanilla, salt, and milk or cream in small amounts until you reach a spreadable consistency that's neither too stiff nor too soft.
- Stack and crumb coat:
- Level your cake layers if they've domed, place one on a serving plate, spread a generous layer of buttercream, and top with the second layer. Apply a thin crumb coat all over, chill for thirty minutes, and this seals in any stray crumbs before the final frosting.
- Frost with confidence:
- Spread the remaining buttercream smoothly over the entire cake using an offset spatula, creating whatever texture feels right to you. Some people love swirls; some prefer sleek and modern.
- Apply the gold foil:
- Using clean, dry tweezers, carefully pick up pieces of edible gold foil and press them gently onto the frosting in whatever pattern speaks to you. Work slowly and gently since the foil is incredibly delicate.
- Add the diploma topper:
- Place your diploma-shaped topper at the center or side of the cake, add sprinkles or confetti if you're feeling festive, and give everything a final chill. By the time you serve it at room temperature, it will be picture-perfect.
 Pin this
 Watching my daughter take the first bite, with her friends gathered around and that diploma topper catching the light, felt like something more than just eating cake. In that moment, all the small worries about whether I'd creamed the butter long enough or applied the gold foil straight just disappeared.
Flavor Variations That Honor the Occasion
The vanilla base is perfect as written, but there's room to play if you want to personalize it further. Adding a teaspoon of almond extract to the batter gives everything a subtle warmth that feels almost like a secret ingredient; your guests will taste something special without quite being able to name it. If you want to match the school colors, gel food coloring mixed into the buttercream looks far more sophisticated than sprinkles alone, turning the frosting itself into a celebration of the graduating class.
Making or Buying the Diploma Topper
Store-bought toppers are perfectly respectable and save you time when you're already managing a cake, but there's something memorable about a fondant diploma made with your own hands. If you go homemade, simple fondant rolled thin, cut into a diploma shape with a knife, and decorated with edible markers feels personal in a way a store-bought version never quite does. Either way, this little detail carries so much of the meaning, so don't stress over making it perfect.
The Gold Foil Strategy and Other Finishing Touches
Gold foil is forgiving once you understand its temperament; it's delicate but not fragile if you handle it respectfully with dry tweezers or fingers. You can create patterns—a stripe up one side, scattered pieces across the top, a full border around the base—or let instinct guide you in the moment. Edible glitter and sprinkles work beautifully too, though they read differently on the palate; gold foil is purely visual, while sprinkles add a slight crunch.
- Keep the edible gold foil sheets in their original packaging until the moment you use them, since humidity is its only real enemy.
- If you're feeling ambitious, use two complementary frosting colors piped in stripes or swirls before adding the gold.
- Don't overthink the placement; asymmetrical gold foil actually looks more intentional and artistic than perfectly geometric patterns.
 Pin this
 This cake became the centerpiece of a moment I'll remember forever, and that's really what good food does. Make it for someone you're proud of, and let the gold foil catch the light while everyone celebrates.
Frequently Asked Recipe Questions
- → What temperature should the oven be preheated to?
Preheat the oven to 350°F (175°C) for even baking of the layers.
- → How do I achieve a smooth buttercream frosting?
Beat unsalted butter until creamy, gradually add powdered sugar, vanilla, salt, and milk to reach a smooth, spreadable consistency.
- → How is the edible gold foil applied?
Use tweezers to carefully place the delicate edible gold foil sheets on the cake to create a luxurious effect without tearing.
- → Can I customize the cake colors?
Gel food coloring can be added to the buttercream to match school or celebration colors perfectly.
- → What is the best way to assemble the layers evenly?
Level cooled cake layers if needed, then spread a thick layer of buttercream between them for balanced support and smooth stacking.