 Pin this
 My sister texted me at midnight with a crisis: she'd volunteered to bring treats to her friend's graduation party the next afternoon and had nothing. I found myself in the kitchen at 1 AM, flour in my hair, thinking that cupcakes with little graduation caps felt like the perfect answer—small enough to make quickly, meaningful enough to celebrate something real. The idea of turning simple frosting and candy into tiny mortarboards made me smile through the exhaustion, and by the time the first batch came out of the oven, I knew these would be exactly what the moment needed.
Watching my sister hand these out at the party was the best part. Graduates were picking them up carefully like they were art installations, then their faces would light up when they bit into actual good cake underneath the decoration. Someone asked if I'd made them professionally, and my sister just grinned and said, "My baker sister came through at midnight," which somehow made the whole rushed process feel worth every yawn the next day.
Ingredients
- All-purpose flour: The foundation of tender crumb; sifting isn't absolutely necessary but it does eliminate any surprise lumps that somehow hide in bags.
- Granulated sugar and softened butter: Creaming these together until actually fluffy (takes about three minutes) is what makes the cake tender rather than dense, so don't skip this step even though it feels like nothing's happening.
- Eggs: Add them one at a time so they incorporate smoothly and your batter stays unified instead of looking curdled.
- Whole milk: The coolness balances the butter and prevents overmixing, which is why we add it between the dry ingredients.
- Baking powder and salt: These seem tiny but they're doing crucial work; salt especially rounds out sweetness in ways people never consciously notice.
- Vanilla extract: Pure vanilla tastes noticeably better than imitation, and this is one place where splurging actually matters.
- Powdered sugar for frosting: Sift it even though it's annoying; unsifted lumps will make your frosting grainy and disappointing.
- Mini peanut butter cups and chocolate squares: These are the structural base of your graduation caps; chocolate squares should be roughly square and sturdy enough to hold a peanut butter cup.
- Licorice or sour candy strips: These become the tassel and they should be thin enough to look elegant but sturdy enough not to break during assembly.
- Mini M&Ms or candy pearls: These finish the cap detail and honestly any small round candy works as long as it appeals to you visually.
Tired of Takeout? 🥡
Get 10 meals you can make faster than delivery arrives. Seriously.
One email. No spam. Unsubscribe anytime.
Instructions
- Set your oven and prep your station:
- Preheat to 350°F and line your muffin tin with paper liners, then gather all ingredients so you're not hunting for things mid-mix. This feels obvious but it genuinely changes the texture of your baking day.
- Create a fluffy butter-sugar base:
- Beat softened butter and sugar together for about three minutes until it's pale and noticeably lighter; you're incorporating air that will make the cake tender. Add eggs one at a time, beating briefly after each, then stir in vanilla.
- Build the dry mixture:
- Whisk flour, baking powder, and salt together in a separate bowl so the leavening is evenly distributed throughout.
- Alternate wet and dry gently:
- Add half the dry mixture to your butter base and stir until just combined, then add milk, then the remaining dry ingredients. Overmixing develops gluten and makes cupcakes tough, so mix only until you don't see streaks of flour.
- Bake with intention:
- Divide batter evenly among liners and bake 18–20 minutes until a toothpick comes out clean or with just a few crumbs. They'll seem underbaked to paranoid bakers like me, but they continue cooking slightly as they cool.
- Make frosting while cakes cool:
- Beat softened butter until smooth, then gradually add sifted powdered sugar while mixing so it doesn't puff into your face. Add milk and vanilla once the sugar is incorporated, then beat until fluffy and spreadable.
- Frost with confidence:
- A swirl with the back of a spoon creates a casual, elegant look, or use a piping bag if you want something more architectural. Either way, these cupcakes forgive imperfect frosting.
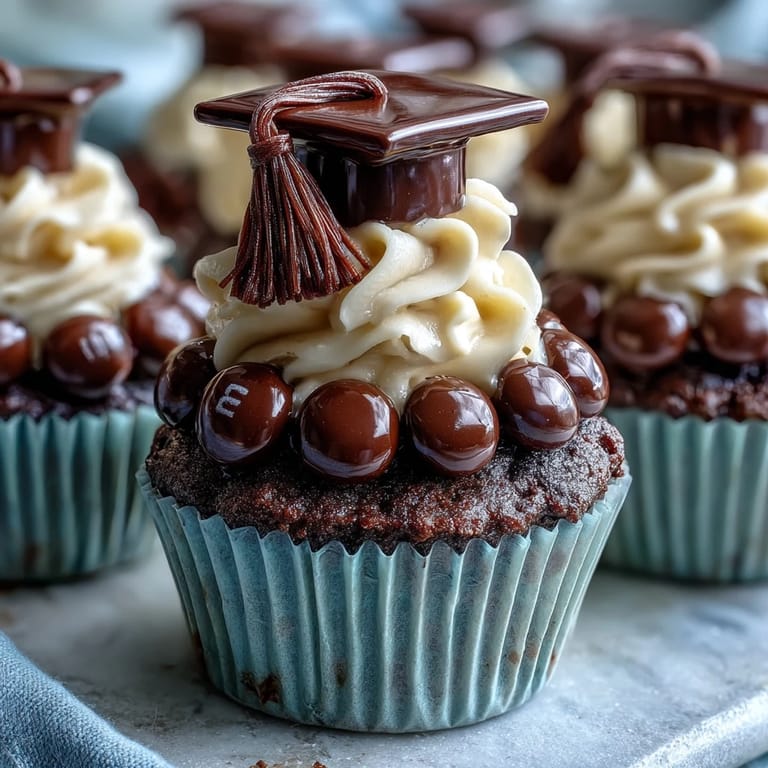
- Assemble graduation caps with patience:
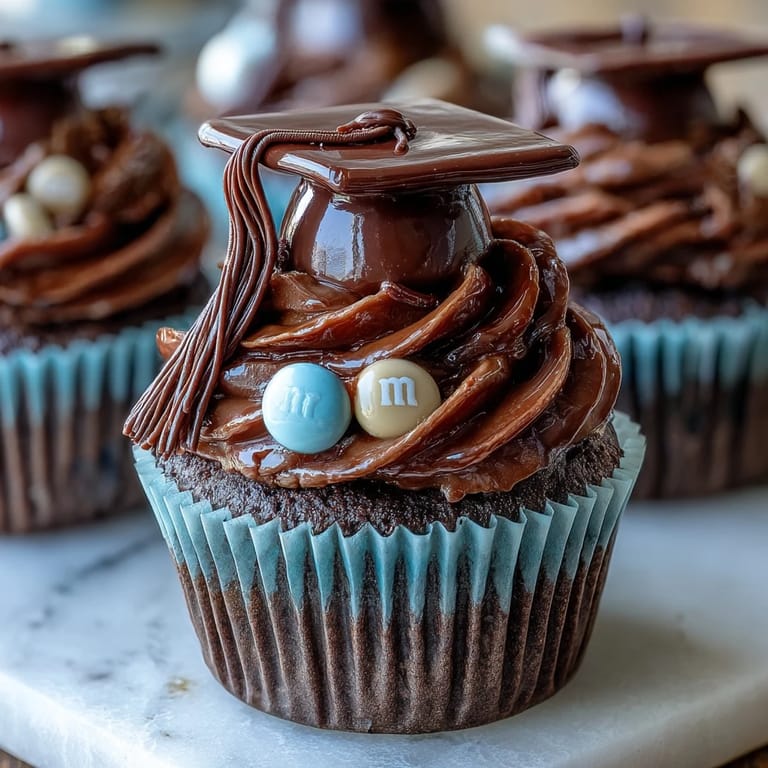
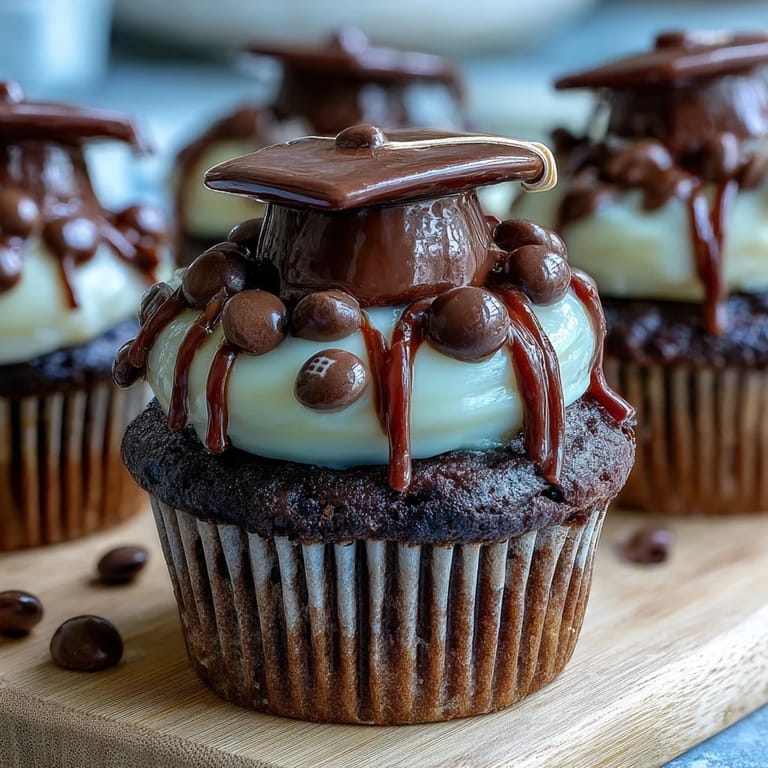
- Place a chocolate square flat, attach an upside-down peanut butter cup to the center with a tiny dab of melted chocolate or frosting, add a licorice strip as the tassel, and top with a candy pearl as the button. Let everything set for a few minutes before placing caps on cupcakes.
 Pin this
 There's something about celebrating someone's big moment with food you made yourself that feels more genuine than anything store-bought. These cupcakes became part of the memory of that graduation, and now whenever my sister sees a graduation cap, she texts me a cake emoji, which is a small thing that makes me smile.
Customizing Your Cupcakes
Food coloring transforms these from simple to spectacular when you match your graduate's school colors—just add a few drops to your frosting while mixing, and the whole presentation suddenly feels intentionally celebratory. You can also swap the vanilla cake for chocolate if that's what the graduate prefers, though you'll need to adjust your dry ingredients slightly (reduce flour to 1 1/4 cups and add 1/4 cup cocoa powder). The frosting itself is versatile too; a little almond extract instead of all vanilla, or a tablespoon of lemon juice instead of some milk, creates subtle flavor shifts that feel special without being risky.
Storage and Timing
Baked cupcakes keep at room temperature for up to two days in an airtight container, so you can absolutely make them the day before if the morning feels hectic. Frosting them ahead means they dry out slightly, so I frost and cap them within a few hours of serving if possible, but life isn't always that organized and they'll still taste fine if you need to make them earlier. The decoration work—assembling the caps—is actually the thing that takes time, not the baking, so if you want to get ahead, do all of that the night before and just place the caps on frosting the morning of the party.
Making Them Feel Special
These cupcakes feel handmade in the best way because they actually are; the imperfections in the frosting swirls and the slight irregularity of the candy toppers is what makes them look homemade rather than industrial. A small card next to the plate saying you made them for this specific person transforms them from dessert into a gift, which changes how people taste them. If you're bringing these somewhere, pack them carefully in a sturdy box with parchment between layers, and arrive early enough that you're not rushing to arrange them.
- School colors in the frosting show you actually thought about the person graduating.
- Letting guests know someone in their life made these by hand hits different than explaining you bought them.
- Taking a photo before everyone digs in creates a memory you can send to the graduate later.
 Pin this
 Baking for celebrations reminds you that food is partly about nourishment but mostly about showing someone they matter. These cupcakes do that quietly and deliciously.
Frequently Asked Recipe Questions
- → What ingredients create the cupcake base?
The base combines all-purpose flour, granulated sugar, unsalted butter, eggs, whole milk, baking powder, salt, and vanilla extract to form a tender, moist crumb.
- → How is the buttercream frosting prepared?
Softened butter is beaten smooth, then gradually combined with powdered sugar, milk, vanilla extract, and a pinch of salt until fluffy and spreadable.
- → What components make up the cap toppers?
Cap toppers are crafted using mini peanut butter cups or chocolate squares, chocolate square candies, licorice strips for tassels, and mini M&Ms or candy pearls as buttons.
- → Are there nut-free options for the toppers?
Yes, chocolate square candies can replace peanut butter cups to accommodate nut allergies, ensuring safe enjoyment.
- → How should cupcakes be stored after assembly?
Store cupcakes in an airtight container at room temperature for up to two days to maintain freshness and texture.
- → Can frosting be customized with colors?
Food coloring may be added to the frosting to match school colors or personal themes for a festive appearance.