 Pin this
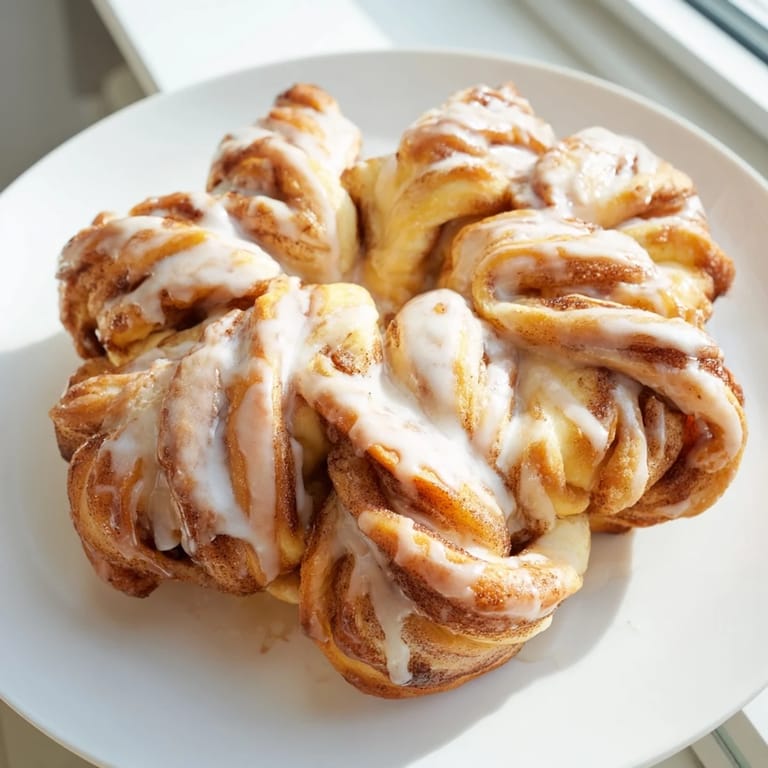
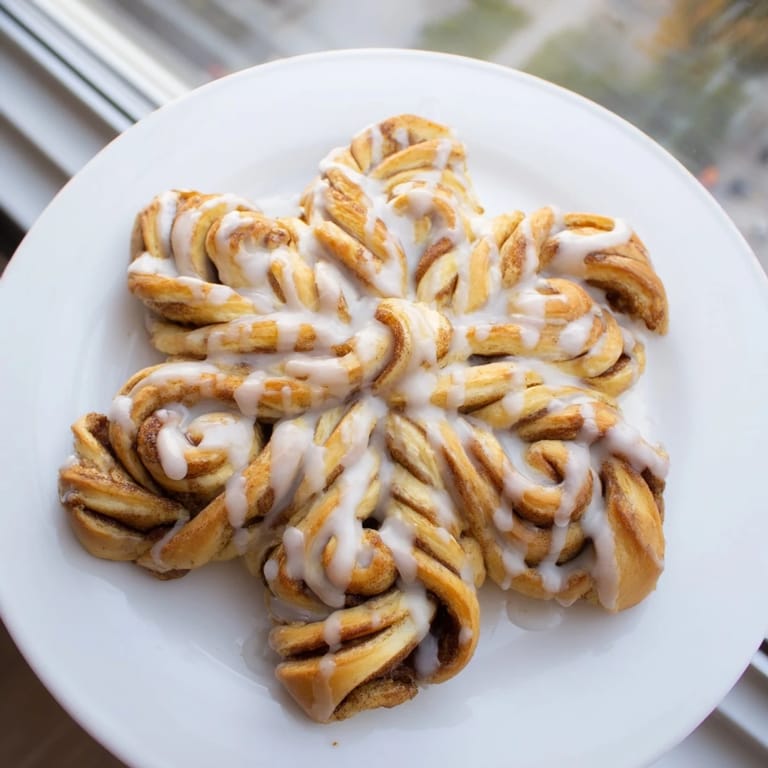
 There's something about pulling apart a warm cinnamon roll that makes people smile before they even taste it. I discovered this snowflake version on a snowy morning when I was trying to impress my neighbors with something more interesting than the usual batch of cookies. The moment I twisted those dough strips and watched them spiral outward, I knew I'd stumbled onto something special—a dessert that's as much about the ritual of sharing as it is about the cinnamon and butter melting on your tongue.
Last winter, I made this for my book club on a Friday morning, and nobody wanted to leave when it came time to go. We ended up sitting around the kitchen island for two extra hours, just pulling pieces off the snowflake and talking. My friend Sarah said it was the first time she'd seen her kids actually sit still and enjoy breakfast together without screens, and that comment stuck with me more than any compliment about the baking.
Ingredients
- All-purpose flour: This is your foundation; I've learned that measuring by weight rather than scooping keeps the dough from getting dense.
- Active dry yeast: Make sure yours hasn't expired, and let it bloom in that warm milk so you can see the little bubbles that mean it's alive and ready to work.
- Warm milk: Too hot and it kills the yeast; too cold and nothing happens—aim for 110°F, the temperature of a baby's bathwater.
- Unsalted butter: Using unsalted lets you control the salt in the dough and gives you a cleaner cinnamon flavor in the filling.
- Egg: Room temperature eggs mix more smoothly into your dough and create a more tender crumb.
- Brown sugar and cinnamon filling: Brown sugar has molasses in it, which adds a subtle richness that white sugar can't match.
- Powdered sugar icing: The milk thins it to the right drizzling consistency, and vanilla ties everything together with a warm, familiar note.
Tired of Takeout? 🥡
Get 10 meals you can make faster than delivery arrives. Seriously.
One email. No spam. Unsubscribe anytime.
Instructions
- Bloom the yeast:
- Combine warm milk, sugar, and yeast in a large bowl and wait for that magical frothy layer on top. This 5 to 10 minutes tells you the yeast is ready to leaven your dough.
- Build the dough:
- Stir in the melted butter, egg, and salt, then gradually add flour until you have a soft, shaggy mass that comes together. Don't overthink it at this stage.
- Knead until smooth:
- Work the dough on a lightly floured surface for 5 to 7 minutes until it's smooth and elastic and springs back when you poke it. You'll feel the transformation happen under your hands.
- First rise:
- Place the dough in a greased bowl, cover it with a kitchen towel, and let it rest in a warm spot (I use a turned-off oven with the light on) until it's doubled in size—usually about an hour.
- Prep your workspace:
- Preheat your oven to 350°F and line a baking sheet with parchment paper so your snowflake won't stick.
- Divide and roll:
- Punch down the dough to release the air, divide it into three equal pieces, and roll each one into a 12-inch circle about a quarter-inch thick. Don't worry if they're not perfect circles; they'll look beautiful no matter what.
- Layer with filling:
- Place the first circle on your prepared baking sheet, spread half of the softened butter over it, and sprinkle with half the cinnamon-sugar mixture. Stack the second circle on top, repeat with the remaining butter and cinnamon sugar, then crown it with the third circle.
- Create the snowflake shape:
- Set a small glass in the very center of your three-layer stack—this will be your guide. Using a sharp knife, cut the dough into 16 equal strips radiating outward from the glass like spokes on a wheel.
- Twist and pinch:
- Take two adjacent strips and twist them away from each other twice, then pinch the ends together to form a sharp point. Repeat this with every pair until you have eight beautiful twisted points radiating out like a snowflake.
- Final rise:
- Remove the glass carefully, cover the snowflake with a clean towel, and let it rise for about 15 minutes while your oven comes to temperature.
- Bake until golden:
- Bake for 22 to 25 minutes until the top is deep golden brown and the whole kitchen smells like cinnamon heaven. You'll know it's done when it's firm on top but still gives slightly when pressed.
- Cool and ice:
- Let it cool for about 10 minutes, then whisk together your icing ingredients and drizzle it generously over the warm snowflake so it pools into all those twisted crevices. Serve it pull-apart style right from the pan.
 Pin this
 I'll never forget watching my seven-year-old niece carefully pull apart her first piece and declare it "the most beautiful bread I've ever eaten." That single moment—where she saw it as art before she tasted it—reminded me why baking matters so much more than just feeding people.
Why This Snowflake Shape Works
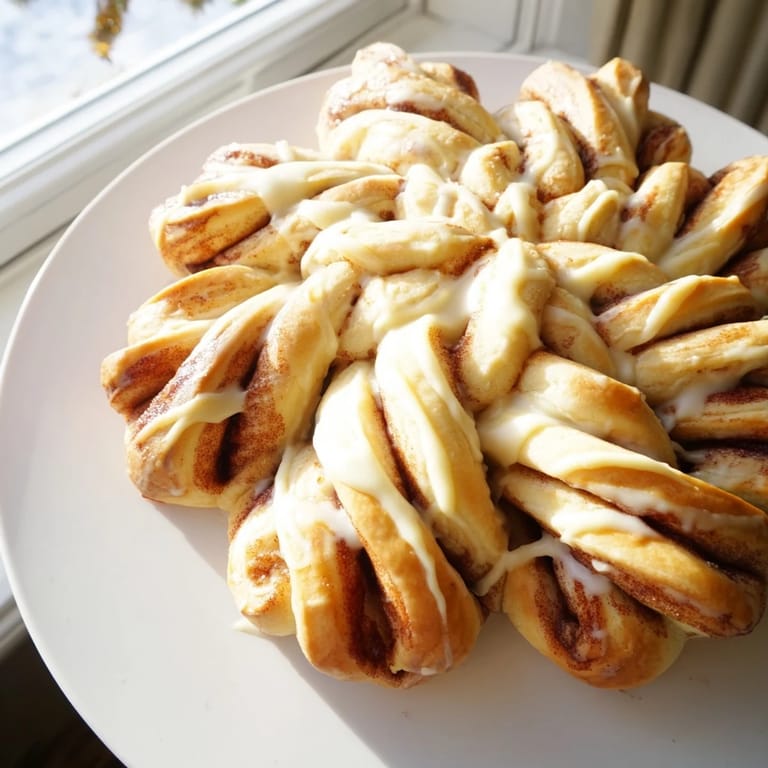
The twisted points aren't just for show; when you bake three layers of dough and cinnamon sugar stacked together, the twisting creates those gorgeous, crispy edges on the outside while keeping the inner layers soft and gooey. The shape also means everyone gets a piece that's part cinnamon-swirled interior and part golden, caramelized exterior. It's the reason people gravitate toward the edges first—they're after that textural contrast without even realizing it.
Making It Your Own
Once you've made this a couple of times and feel confident with the dough, it becomes a canvas for your own ideas. I've added chopped toasted pecans to the filling when I wanted something nutty, and I've experimented with brown butter icing instead of plain vanilla when I was feeling fancy. The beauty of this recipe is that the technique is solid enough that you can play with flavors without worrying the whole thing will fall apart. My friend who's obsessed with cardamom swears by adding half a teaspoon to the cinnamon sugar, and honestly, she's onto something.
Serving and Storage
This snowflake is best the day you make it when the dough is still soft and pillowy, but it keeps beautifully wrapped in foil for the next day—just warm it gently in a 300°F oven for about 10 minutes to bring back the tender texture. It also freezes well before baking; I've made the shaped snowflake, frozen it overnight, then baked it the next morning from frozen, adding just a few extra minutes to the bake time. Pair it with hot chocolate, strong coffee, or just a glass of cold milk.
- Serve while it's still warm for the best texture and icing distribution.
- Wrap leftovers loosely in foil to keep them from drying out.
- You can make this the night before, refrigerate the shaped snowflake, and bake it the next morning for a stress-free breakfast.
 Pin this
 This snowflake might be my favorite thing I've ever baked because it brings people together in a way that quiet, individual pastries never quite manage. It's meant to be shared, pulled apart, and savored over conversation, and that intention is baked right into the recipe.
Frequently Asked Recipe Questions
- → How do I achieve the snowflake shape?
After layering the cinnamon-sugar spread on three dough circles, place a small glass in the center and cut 16 strips outward. Twist each pair of adjacent strips twice away from each other and pinch the ends together to form the snowflake.
- → Can I make the dough richer?
Yes, substitute half the milk with heavy cream to create a richer, more tender dough with a buttery flavor.
- → What is the best way to spread the icing?
Whisk powdered sugar, milk, and vanilla extract until smooth, then drizzle the glaze evenly over the warm pull-apart once cooled slightly for a glossy finish.
- → Can I add nuts or other fillings?
Absolutely, add toasted pecans or raisins to the cinnamon sugar filling for extra texture and flavor.
- → How long should the dough rise?
The dough should rise for about 1 hour until doubled in size before shaping, then an additional 15 minutes after forming the snowflake to ensure a light texture.