 Pin this
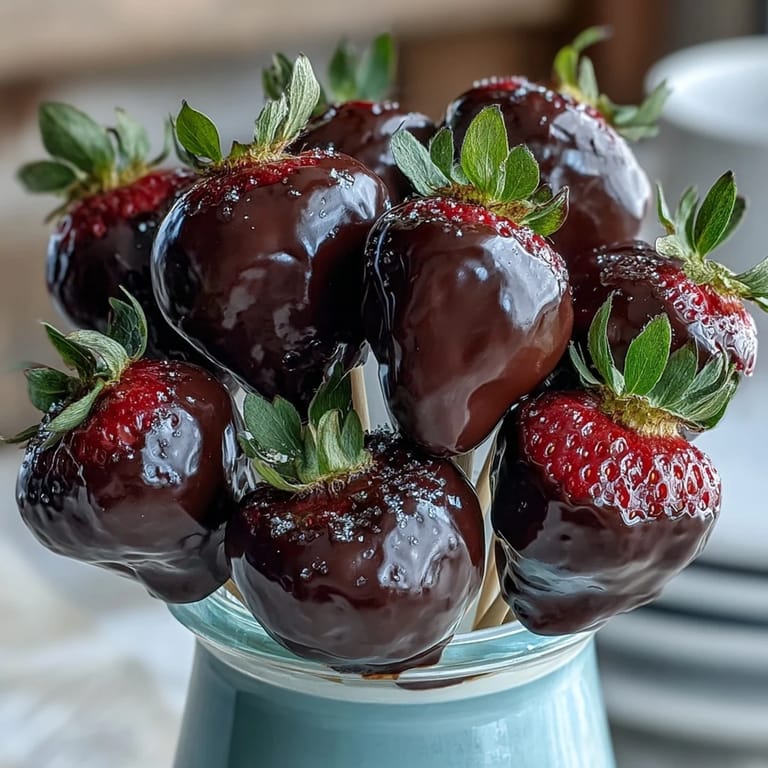
 My coworker Sarah walked past my desk holding a stunning arrangement of chocolate-covered strawberries, and I watched her face light up when she unwrapped them at lunch. That afternoon, I realized the magic wasn't just in how they tasted—it was in the effort someone had taken to make something beautiful by hand. I went home determined to master this simple but show-stopping gift, and now it's become my go-to whenever I want to impress someone without spending hours in the kitchen.
I made my first batch on a rainy February evening, not even thinking about Valentine's Day at first—I just wanted to use up some beautiful berries before they went soft. My partner came home early, saw them chilling in the fridge, and asked if they were for someone else. That's when I knew this wasn't just a recipe; it was a small way to show I'd been thinking about him all afternoon.
Ingredients
- Fresh strawberries (12 large, stems on): The stars of the show, and their firmness matters more than size—soft ones will slide off the skewer before you finish dipping.
- Semisweet or dark chocolate (120 g): Choose good quality since this is your main flavor, and avoid anything with a waxy feel since it won't coat smoothly.
- White chocolate (60 g, optional): This is your drizzle magic if you want contrast, though the dark chocolate alone makes a bold statement.
- Chopped nuts, shredded coconut, sprinkles (optional): These go on while chocolate is still tacky, so have them ready in small bowls before you start dipping.
- Wooden skewers, floral tape or ribbon, tissue paper: The presentation matters as much as the taste—these humble supplies transform strawberries into a gift.
Tired of Takeout? 🥡
Get 10 meals you can make faster than delivery arrives. Seriously.
One email. No spam. Unsubscribe anytime.
Instructions
- Prepare Your Strawberries:
- Wash and completely dry each berry by gently patting with paper towels—any moisture will prevent chocolate from sticking properly. Line a baking sheet with parchment paper so your finished berries won't stick.
- Skewer Them Gently:
- Insert a wooden skewer into the stem end of each strawberry, pushing slowly until it's secure but not splitting the fruit. Think of it like you're threading through delicate fabric, not driving a nail.
- Melt the Chocolate:
- Use a heatproof bowl set over simmering water or microwave in 20-second bursts, stirring between each burst until completely smooth. The double-boiler method feels slower but gives you better control over temperature.
- Dip with Confidence:
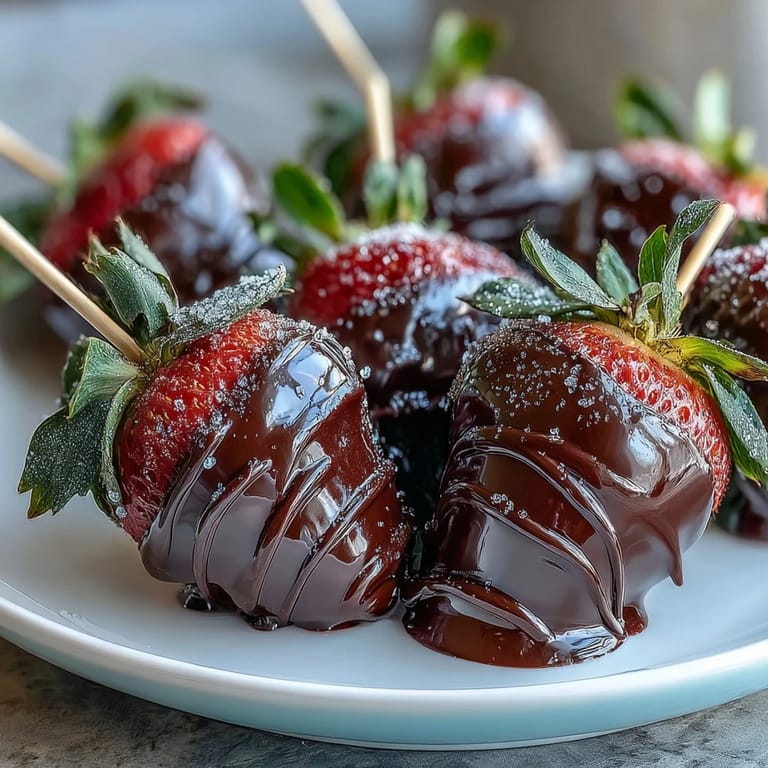
- Holding the skewer, swirl each strawberry in melted chocolate, letting excess drip off naturally, then place it carefully on parchment. Work quickly but not frantically—chocolate stays workable for longer than you'd think.
- Add Your Texture (Optional):
- If you're using nuts, coconut, or sprinkles, dust them on immediately while chocolate is still slightly tacky. This is the moment where something simple becomes restaurant-worthy.
- White Chocolate Drizzle:
- Melt white chocolate separately and drizzle it over cooled dark chocolate for visual contrast, or skip this step if you prefer simplicity. Use a fork or the tip of a spoon for loose, artistic lines.
- Let Them Set:
- Refrigerate for at least 15 minutes until chocolate firms up completely. This is a good moment to clean up, take a breath, or prep your wrapping.
- Arrange Into a Bouquet:
- Gather all the skewers together, adjusting berry heights so they fan out naturally like flowers. Secure the bundle with floral tape or ribbon wrapped around the stems, then wrap the base with tissue paper for a polished finish.
 Pin this
 My sister surprised me with these at my office birthday party last year, and I remember being more moved by the thoughtfulness than the taste—though the taste was incredible. That's when I understood why people spend their energy on homemade gifts: something made by hand carries an entirely different weight than something purchased.
Timing and Temperature Secrets
These are best served at room temperature even though you'll store them cold, so take them out of the fridge about 20 minutes before gifting. Cold chocolate tastes muted and waxy on the tongue, but room temperature brings out the richness you worked for. This one detail is why restaurant versions taste better than homemade ones—most people eat them straight from the fridge without realizing the difference.
Customizing Your Bouquet
The beauty of this recipe is how forgiving it is with variations—I've made batches with milk chocolate for people who prefer sweetness, and others where I toasted the nuts first to add depth. Flavor extracts work beautifully if you want something memorable: a tiny drop of orange extract, raspberry extract, or even peppermint can shift the entire personality of your bouquet. The decoration is entirely up to you, and sometimes the most striking bouquets are the simplest ones with nothing but glossy dark chocolate.
- Toast your nuts lightly in a dry pan to intensify their flavor before sprinkling on chocolate.
- Add a whisper of vanilla extract or almond extract directly into melted chocolate for subtle sophistication.
- Skip decorations if you want an elegant, understated look that lets the berries speak for themselves.
Storage and Shelf Life
These keep beautifully in the refrigerator for up to three days, which takes pressure off if you're making them ahead for a gift. Just wrap them loosely so condensation doesn't accumulate and make the chocolate weep. If you're giving them as a gift and they'll sit out for an hour or two, they'll actually taste better than fresh—the chocolate firms to the perfect snap, and the berry releases just enough juice to complement the coating.
 Pin this
 This recipe became my answer to the question of how to show someone they matter without elaborate planning. Whether it's Valentine's Day, an apology, a celebration, or just Tuesday, a bouquet of chocolate-covered strawberries says everything that matters.
Frequently Asked Recipe Questions
- → What type of chocolate works best for coating strawberries?
Semisweet or dark chocolate melts smoothly and provides a rich flavor that complements the fresh strawberries well. White chocolate can be used for decorative drizzles.
- → How can I keep the strawberries fresh and firm?
Choose ripe but firm strawberries, and make sure they are completely dry before dipping to ensure the chocolate adheres properly without moisture affecting texture.
- → Can I use toppings on the chocolate coating?
Yes, sprinkling chopped nuts, shredded coconut, or edible glitter before the chocolate sets adds a delightful texture and enhances the bouquet’s appearance.
- → How long should I chill the strawberries after dipping?
Chill the dipped strawberries in the refrigerator for at least 15 minutes to allow the chocolate coating to firm up completely before arranging the bouquet.
- → What is the best way to arrange the strawberries into a bouquet?
Secure the skewered strawberries together using floral tape or ribbon, then wrap the base with tissue paper or cellophane for an elegant and festive presentation.
- → Can I prepare this bouquet in advance?
Yes, it can be made a few hours ahead and stored in the refrigerator. Bringing it to room temperature before serving enhances the flavor and texture.