Chocolate Gold Coin Stack

Featured in: Sweet Little Treats

This festive display features shimmering stacks of chocolate gold coins, artfully arranged using royal icing or melted chocolate to hold layers together. Each stack is tied with a festive ribbon and optionally dusted with edible gold glitter for a sparkling touch. Perfect as a decorative centerpiece, these no-bake stacks come together quickly and offer a sweet accent for holidays or special events.

Using assorted coin sizes, the stacking creates a delightful layered effect, while gift tags or holiday stickers add personalized charm. Store in a cool place and enjoy the ease and elegance of this simple but eye-catching treat.

Updated on Fri, 12 Dec 2025 11:54:00 GMT
Glistening chocolate gold coin stacks, a fun and easy dessert centerpiece for any celebration. Pin this
Glistening chocolate gold coin stacks, a fun and easy dessert centerpiece for any celebration. | recipeshood.com

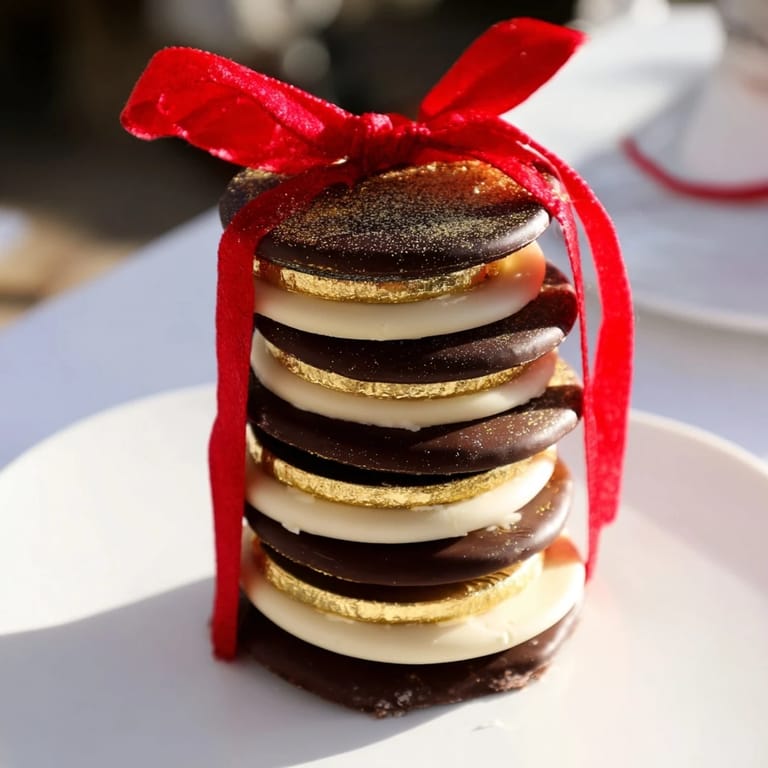
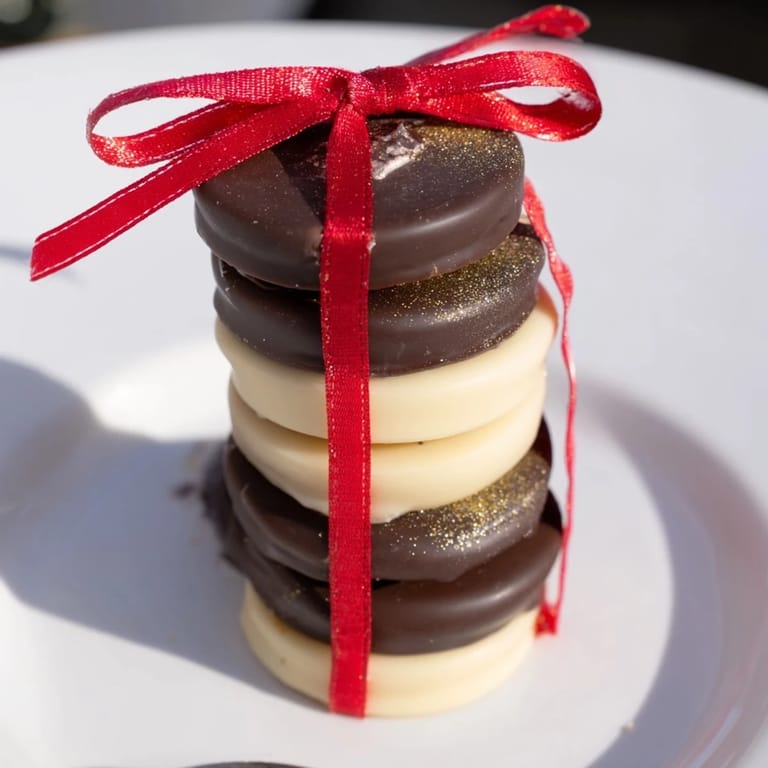
A festive and eye-catching centerpiece featuring stacks of shimmering chocolate gold coins, perfect for holidays, parties, or special events. This no-bake treat is both decorative and delicious, bringing a touch of whimsy and sweetness to any table.

This recipe has quickly become my go-to for adding a sparkly, fun element to holiday gatherings without spending hours in the kitchen.

Ingredients

  • Chocolate Coins: 36–48 foil-wrapped chocolate gold coins (assorted sizes, quality chocolate preferred)
  • Decorations: 2 tablespoons edible gold glitter or gold sanding sugar (optional), 12 festive ribbon strips or curling ribbon (about 6 inches each), 12 small gift tags or holiday stickers (optional)
  • Assembly: 1/4 cup royal icing or melted chocolate (for stacking/gluing)

Instructions

Step 1:
Prepare your work surface with parchment paper or a clean tray.
Step 2:
Sort chocolate coins by size, grouping similar diameters together.
Step 3:
For each stack, select 3–4 coins of descending size (largest on the bottom, smallest on top).
Step 4:
Place a small dab of royal icing or melted chocolate between each coin and gently press to adhere.
Step 5:
Allow stacks to set for 5–10 minutes until firm.
Step 6:
Tie a festive ribbon around each stack and secure with a knot or bow. Add a gift tag or sticker if desired.
Step 7:
For extra sparkle, lightly brush the tops with edible gold glitter or sprinkle with gold sanding sugar.
Step 8:
Arrange the coin stacks on a decorative platter or display as a centerpiece.
Arrangement of shimmering gold chocolate coin stacks, perfect festive edible decorations for the holidays. Pin this
Arrangement of shimmering gold chocolate coin stacks, perfect festive edible decorations for the holidays. | recipeshood.com

This simple project has brought my family together every holiday season, creating joyful moments as we assemble and share these glittering treats.

Required Tools

Parchment paper or tray, small piping bag or spoon for icing or chocolate, scissors for ribbon, decorative platter for display.

Allergen Information

Contains milk and soy common in chocolate coins. May contain traces of nuts gluten or other allergens depending on chocolate brand always check labels.

Nutritional Information

Calories 110, Total Fat 6 g, Carbohydrates 14 g, Protein 1 g per serving/stack (estimate).

Decorative display of chocolate gold coin stacks, ready to eat and made with delicious milk chocolate. Pin this
Decorative display of chocolate gold coin stacks, ready to eat and made with delicious milk chocolate. | recipeshood.com

Enjoy crafting these glittering coin stacks as a delightful centerpiece that combines both beauty and flavor.

Frequently Asked Recipe Questions

What type of chocolate coins work best?

Use foil-wrapped chocolate coins in various sizes for the best stacking effect. Dark, milk, or white chocolate options all work well.

How do I make the stacks stick together?

A small amount of royal icing or melted chocolate acts as an adhesive between coins, securing the layers firmly once set.

Can I prepare the stacks in advance?

Yes, these stacks can be made ahead and stored in a cool, dry place for up to one week without losing shape or flavor.

Are there decorating options for extra sparkle?

Lightly brushing the tops with edible gold glitter or sprinkling gold sanding sugar adds a festive sparkle to each stack.

What occasions suit these chocolate stacks?

This display complements holidays, parties, and special events, adding an elegant and sweet centerpiece touch.

Chocolate Gold Coin Stack

Elegant chocolate coin stacks adorned with gold glitter and ribbons add charm to any celebration.

Prep Duration
20 min
Time to Cook
1 min
Overall Time
21 min
Created by Julia Harris


Level of Challenge Easy

Cuisine Type International

Servings Made 12 Number of Portions

Dietary Details Vegetarian-Friendly

What You'll Need

Chocolate Coins

01 36 to 48 foil-wrapped chocolate gold coins (assorted sizes, quality chocolate preferred)

Decorations

01 2 tablespoons edible gold glitter or gold sanding sugar (optional)
02 12 festive ribbon strips or curling ribbons, approximately 6 inches each
03 12 small gift tags or holiday stickers (optional)

Assembly

01 1/4 cup royal icing or melted chocolate (for stacking and adhering)

Method

Step 01

Prepare Work Surface: Line your work area with parchment paper or use a clean tray to prevent sticking.

Step 02

Sort Chocolate Coins: Organize chocolate coins by size, grouping similar diameters together for stacking.

Step 03

Assemble Stacks: For each stack, select 3 to 4 coins in descending size order, placing the largest at the bottom and smallest on top.

Step 04

Adhere Coins: Apply a small dab of royal icing or melted chocolate between each coin layer and press gently to bond.

Step 05

Set Stacks: Allow the stacks to set undisturbed for 5 to 10 minutes until firm.

Step 06

Add Finishing Touches: Tie a festive ribbon around each stack and secure with a knot or bow. Attach gift tags or stickers if desired.

Step 07

Optional Decoration: Lightly brush the top of each stack with edible gold glitter or sprinkle with gold sanding sugar for extra sparkle.

Step 08

Display: Arrange the finished stacks on a decorative platter or use them as a centerpiece for your event.

Kitchen Tools Needed

  • Parchment paper or tray
  • Small piping bag or spoon for applying icing or melted chocolate
  • Scissors for cutting ribbon
  • Decorative platter for display

Allergen Details

Review every ingredient for allergens and reach out to a professional if you're unsure.
  • Contains milk and soy; may contain traces of nuts and gluten depending on chocolate brand. Verify packaging for allergens.

Nutrition Details (per portion)

Nutrition info is for reference purposes only and isn't medical advice.
  • Energy (Calories): 110
  • Fats: 6 g
  • Carbohydrates: 14 g
  • Proteins: 1 g