Pin this
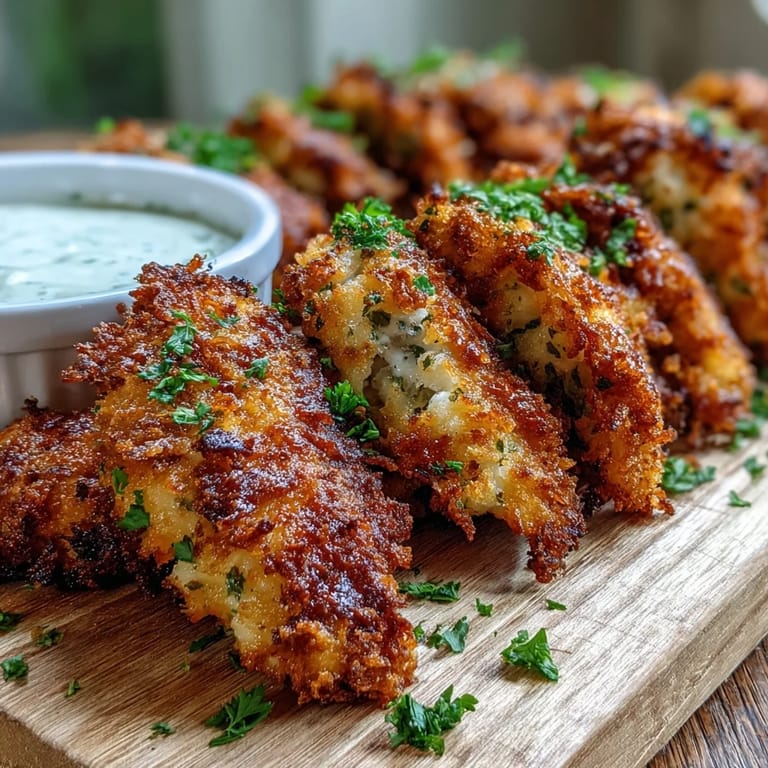
 There's something about the sound of panko hitting hot oil—or in this case, the oven—that instantly transports me back to weeknight dinners when my kids would crowd around the counter, eyes fixed on the golden crust forming in the oven. I discovered this ranch chicken tender recipe during one of those chaotic moments when I needed something that felt homemade but wouldn't keep us waiting all evening. The magic is in that crispy, herb-flecked coating that somehow stays crunchy even as the chicken inside stays impossibly tender.
I remember making these for my nephew's baseball team party on a sweltering June afternoon, setting up a spread in our backyard. The tenders came out golden just as everyone arrived, still warm and crackling, and watching people dip them into ranch while they replayed game highlights reminded me why simple, perfect food brings people together. That day cemented these as my go-to crowd-pleaser whenever I need something that feels special without pretension.
Ingredients
- Chicken tenders (1 ½ lbs): Look for evenly-sized pieces so they cook at the same rate; if you're cutting your own from breasts, aim for roughly ¾-inch thickness.
- Panko breadcrumbs (1 cup): The secret weapon here—panko has larger flakes than regular breadcrumbs, which means bigger pockets for crispiness instead of a dense crust.
- Ranch seasoning mix (1 packet): This does the heavy lifting on flavor; don't skip it or substitute with random dried herbs or you'll lose that unmistakable ranch bite.
- Paprika, black pepper, garlic powder, onion powder (¼–½ teaspoon each): These layer complexity onto the ranch base and keep the coating from tasting one-dimensional.
- Eggs and milk (2 eggs, 2 tablespoons milk): Your adhesive—the milk thins the eggs just enough so the panko sticks evenly without creating thick, gluey patches.
- Cooking spray: This final spritz is what transforms the oven into a makeshift fryer, browning the top surfaces to an impossible golden.
Tired of Takeout? 🥡
Get 10 meals you can make faster than delivery arrives. Seriously.
One email. No spam. Unsubscribe anytime.
Instructions
- Get your mise en place ready:
- Preheat the oven to 425°F and line your baking sheet with parchment or a lightly sprayed surface. Having everything prepped before you start coating chicken makes the whole process feel less frantic and more controlled.
- Make your egg bath:
- Whisk together eggs and milk in a shallow bowl until it's uniform and slightly foamy. This mixture is your glue, so don't overthink it—just make sure the milk is fully incorporated.
- Build your seasoning blend:
- Combine panko, ranch seasoning, paprika, pepper, garlic powder, and onion powder in another shallow bowl. Stir it well so the seasonings are evenly distributed throughout the breadcrumbs rather than clumped in corners.
- Dry your chicken:
- Pat each tender dry with paper towels—this single step determines whether your coating clings or slides off. Moisture is the enemy of crispy coatings.
- Bread with intention:
- Dip each tender into the egg mixture, let excess drip back into the bowl, then place it in the panko mixture and press gently but firmly on both sides so the coating adheres. Work in batches if needed rather than rushing through a pile of wet, slippery chicken.
- Arrange on your sheet:
- Space the breaded tenders with a little room between each one—they're not touching because air circulation is how you get that oven-fried effect. If you have a wire rack, this is the moment to use it.
- Spray for crispiness:
- Give each tender a light misting of cooking spray on top. This step feels optional until you taste the difference it makes; the spray browns the crust while the oven's dry heat cooks the chicken through.
- Bake and flip:
- Bake for 18–20 minutes, flipping halfway through (around the 10-minute mark), until the coating is deep golden and an instant-read thermometer reads 165°F in the thickest part. You'll notice the edges darkening first—that's your signal you're on track.
- Rest briefly, then serve:
- Let them cool for just two minutes so the coating sets and stays crispy rather than steaming itself soft. Finish with fresh parsley and your favorite dipping sauce.
 Pin this
 There was a moment during my nephew's party when his friend—a notoriously difficult eater—reached for a third tender and said, 'These are better than the ones at the place my mom gets.' I've made these dozens of times since, and that compliment still makes me smile because it proved that homemade simplicity, done right, beats convenience every single time.
Why This Method Works Better Than Deep Frying
Baking these tenders at high heat creates the same Maillard reaction that deep frying does—that golden-brown crust where flavors concentrate—except you're using a fraction of the oil and dealing with zero splatter cleanup. The combination of high oven temperature and a final cooking spray essentially air-fries the exterior while the interior steams gently, yielding chicken that's simultaneously crispy and tender. I tried the deep-fryer version once and honestly never went back; the oven method is less messy, more controllable, and tastes nearly identical once you nail the spray step.
Making Them Ahead for Busy Weeknights
You can bread these tenders several hours in advance and refrigerate them on a covered tray; actually, they often brown more evenly if they've had time to chill slightly before hitting the hot oven. On nights when I know dinner will be rushed, I'll bread them in the morning, cover the tray, and just pop them in the oven when I walk through the door. The cold tenders take roughly the same baking time, though occasionally I add a minute or two if they go straight from fridge to oven.
Customizing for Different Tastes and Occasions
This base recipe is endlessly flexible depending on who's eating and what you're in the mood for. One small change shifts the entire personality of the dish—add cayenne to the panko for heat, swap the ranch seasoning for Cajun spice, or use panko mixed with grated Parmesan for a crispy, umami-forward version. I've even made batches with everything bagel seasoning when I had some on hand, and they were unexpectedly excellent with a lemon-herb yogurt sauce.
- For spicier tenders, add a pinch of cayenne pepper or even smoked paprika to amp up warmth without overpowering the ranch.
- Gluten-free versions work perfectly if you swap regular panko for gluten-free panko and check that your ranch seasoning packet is certified gluten-free.
- Serve with unexpected sides like a quick slaw, roasted broccoli, or even over a salad to make the meal feel less heavy.
 Pin this
 These tenders have become my quiet kitchen triumph, the recipe I reach for when I want my family to feel celebrated with minimal fuss. There's real joy in watching something you've made disappear from a plate because it tastes that good.
Frequently Asked Recipe Questions
- → What makes the coating extra crispy?
Panko breadcrumbs create a lighter, airier crunch compared to traditional crumbs. Lightly spraying the tops with cooking spray before baking promotes even browning and crisping.
- → Can I make these ahead of time?
Yes, bread the tenders up to 4 hours ahead and refrigerate. Bake fresh when ready to serve for optimal texture. Leftovers reheat well in a 400°F oven.
- → What dipping sauces work best?
Classic ranch dressing is the natural pairing, but honey mustard, barbecue sauce, or a spicy sriracha-mayo blend all complement the seasoned coating beautifully.
- → How do I know when they're done?
The coating should be golden brown and the chicken should reach an internal temperature of 165°F. Cutting into the largest tender should show opaque, fully cooked meat throughout.
- → Can I air fry these instead?
Absolutely. Cook at 375°F for 10-12 minutes, flipping halfway. The air fryer creates excellent crispiness with less oil and cooks slightly faster than the oven method.